


6 years ago
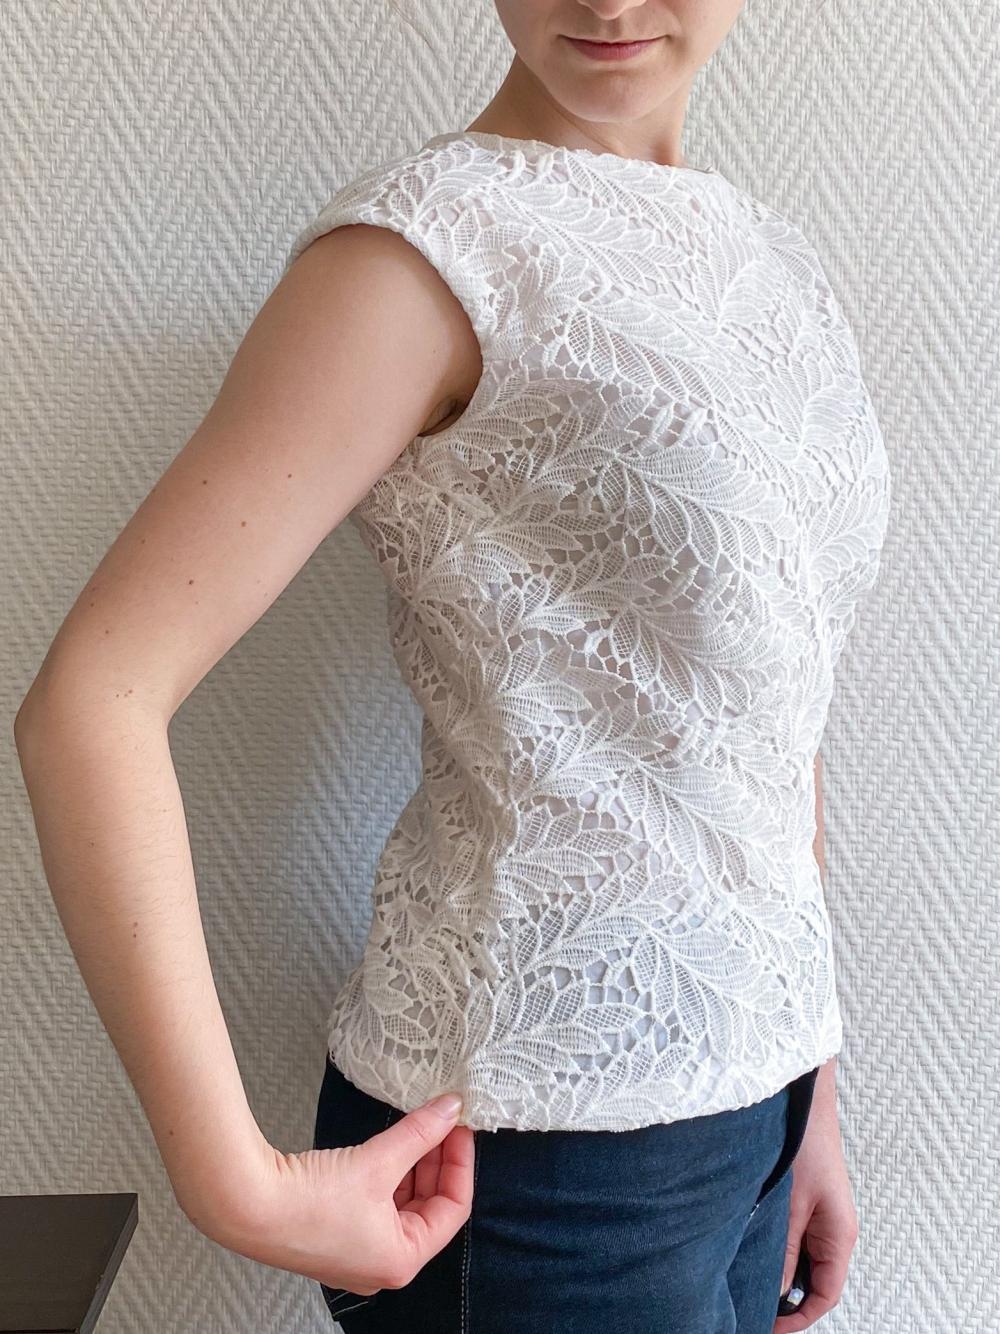
A Delicate Lace Danmark Top
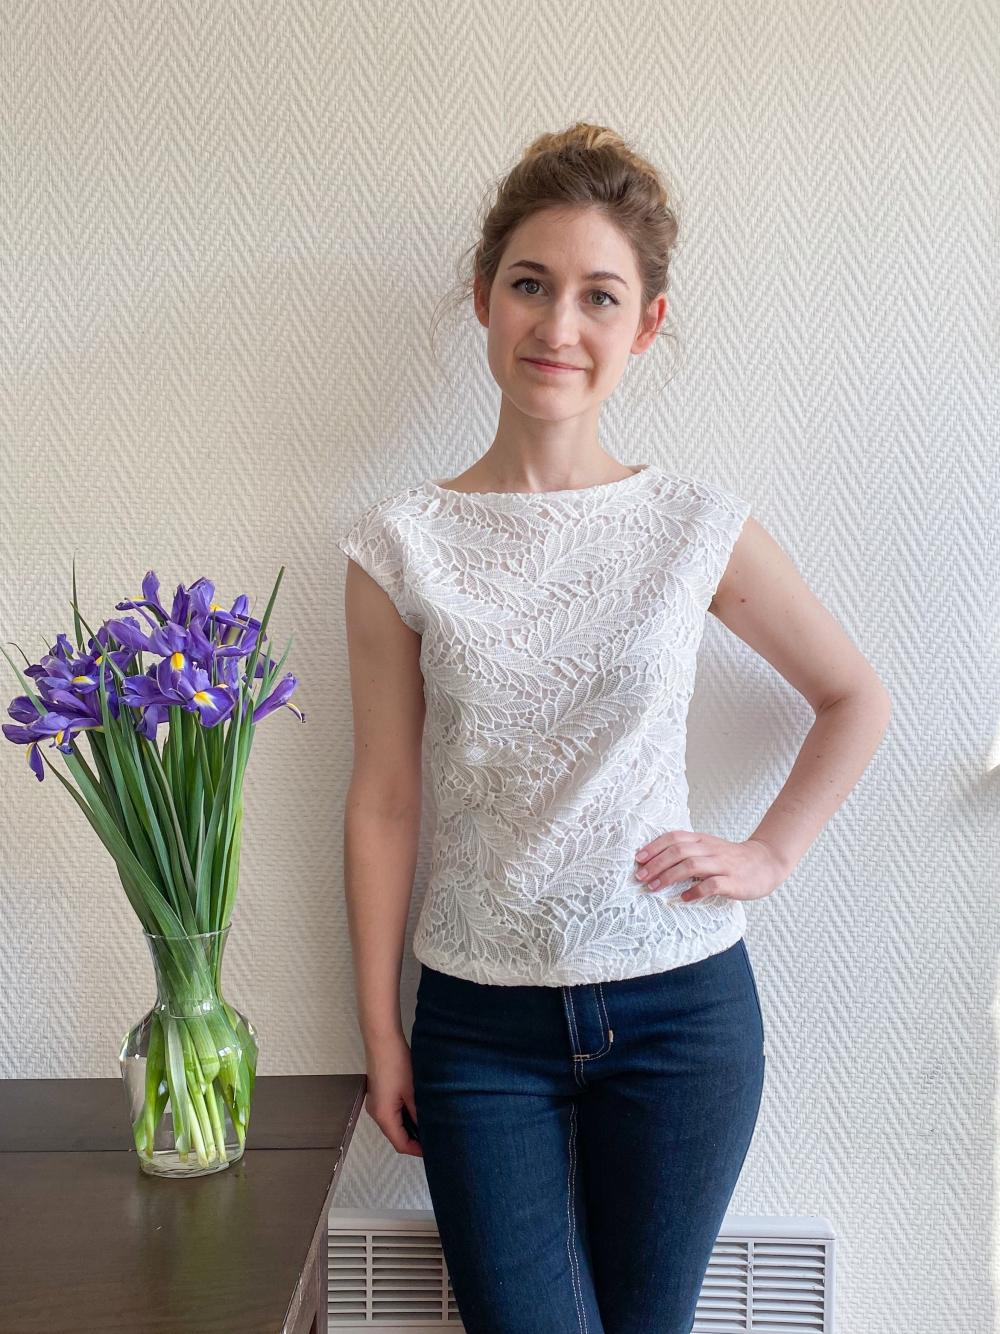
I remember back in 2012-ish when white lace tops were very much in fashion. I had a ready-to-wear stretch lace top that I wore and absolutely loved until the fabric was slack and a grimy, grey color. So ever since I started sewing, I’ve wanted to make another that I could love as dearly as my old top.
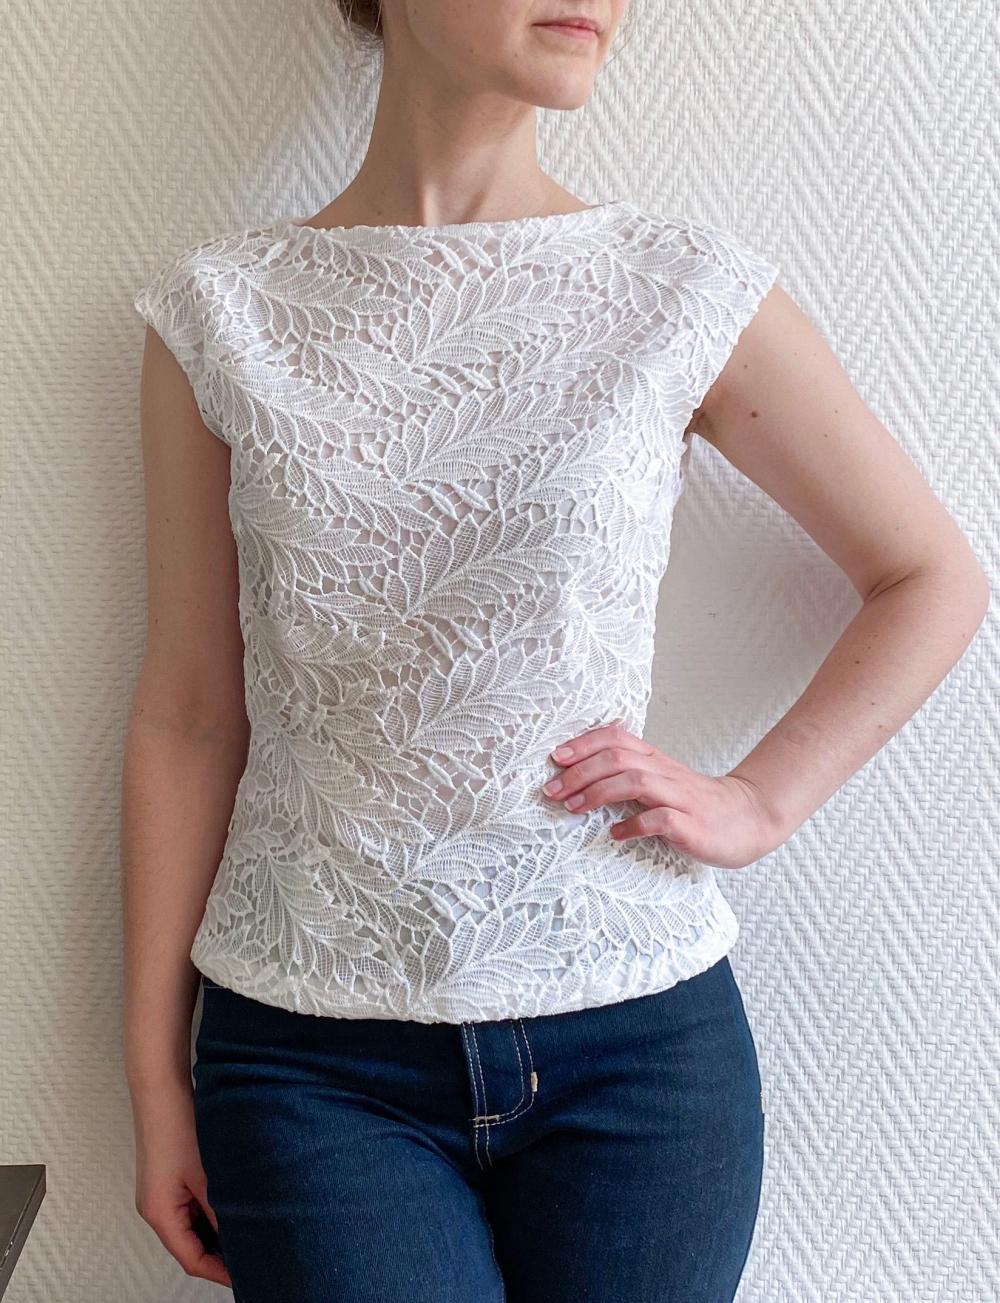
Choosing the right fabric was difficult, though, because a lot of stretch lace either features a pattern that is too busy, too shiny, or meant for lingerie. I had also seen creations popping up with non-stretch guipure lace and the idea of trying my hand with one of these lovely fabrics was very tempting. So when Minerva proposed this embroidered lace fabric in this pretty leaf design, I was hooked!
Choosing the right pattern for this top was very challenging, because I knew I wouldn’t be able to sew seams together normally without creating bulk. At the same time, the boxy silhouette is not for me, so I decided to spend extra time researching how to create shape with non-stretch lace fabrics.
One article that really helped me was the Cashmerette blog post on how to make their Montrose top in guipure lace. It goes into detail on how to cut around the shapes and then layer and sew them down to create seams and darts without adding too much bulk and I highly recommend taking a look. Unfortunately, the Montrose top isn’t offered in my size, so I had to look elsewhere.
In the end, I choose the Danmark top pattern by How to do Fashion (no. 00), a free pattern you get if you sign up to their newsletter. I had made this top once before in a viscose fabric and I liked the feminine shape to it. This fabric also doesn’t come in my size (available in sizes 34-48), but I had previously graded it down manually one size to fit me, including grading the bust and waist darts.
I also choose to line this garment because I wanted the top to be pretty opaque throughout. I choose a cotton lawn in a slightly off-white color that complemented the lace fabric well from the fabric shop Tissus Reine in Paris. I cut out the lining fabric normally, but then retraced the pattern so that I could cut the lace layer out flat (mirroring the front and back to eliminate cutting on the fold) and removed the seam allowance from one of the side seams as well as the neckline and armhole hems (leaving the seam allowances on one of the side seams in order to able to insert a zipper later). Rather than use a facing to finish these edges, I made bias tape from the leftover cotton lawn I had left from cutting out the lining, and I finished those edges with the bias tape.
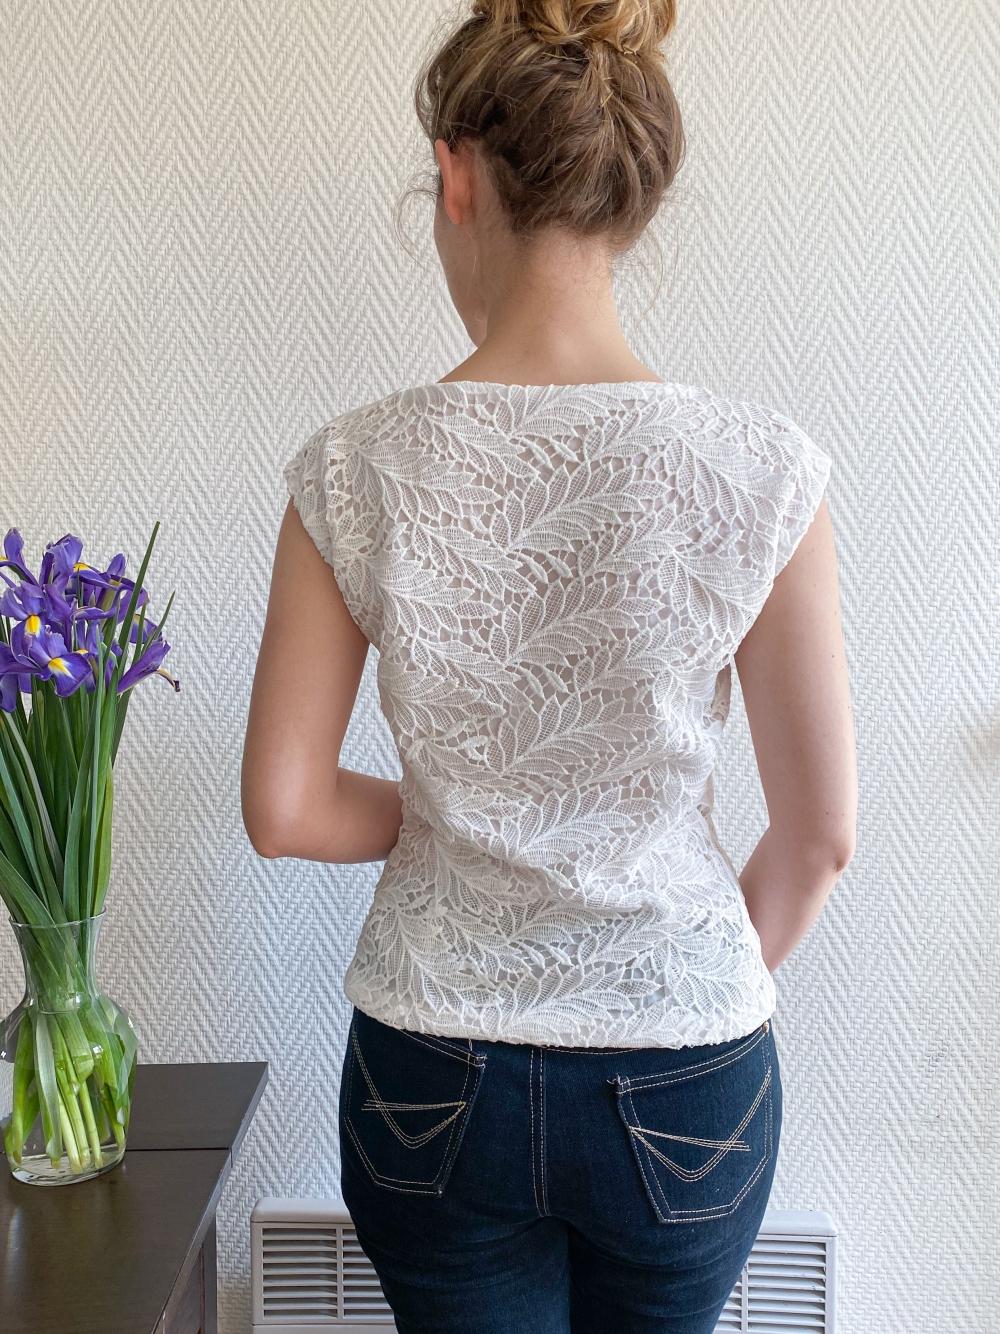
On the lining pieces, I sewed the darts normally, and then sewed the shoulder seams and one side seam with French seams. On the lace fabric, I cut, superposed, and then hand-sewed the six darts and the two shoulder seams. To do so, I thread traced the darts legs and the seam lines where the lace would need to overlap, cut and placed the lace so that the lines corresponded, then carefully hand-sewed the lace layers together with tiny fell stitches, contouring the leaf designs and filling in any gaping holes with scraps. This was a painstakingly long step that I spent hours doing, but it was actually a pretty satisfying step in the end.
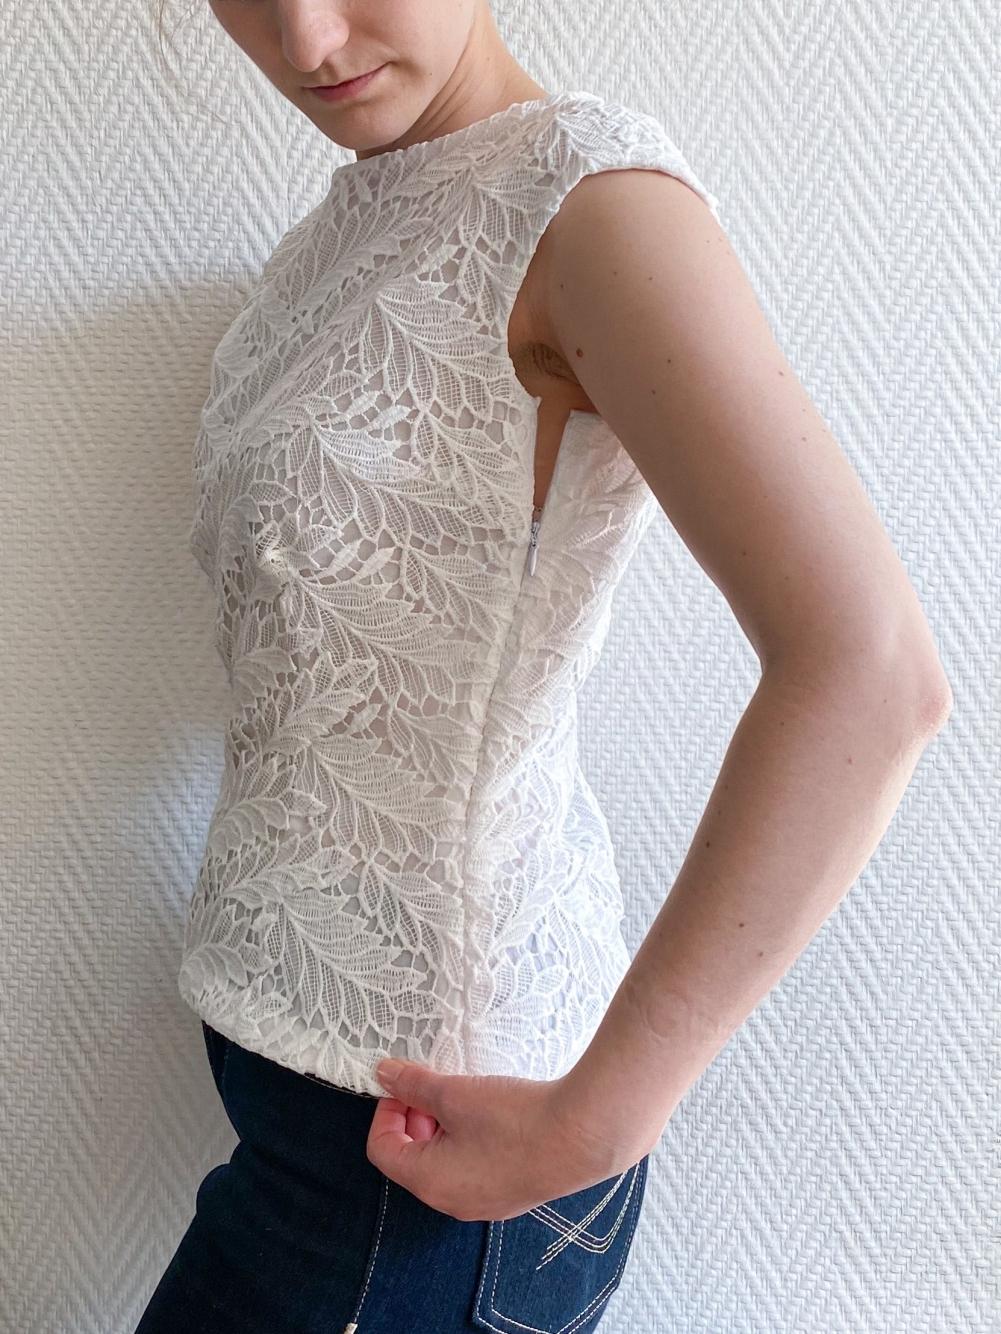
I then placed the lace shell and the lining together and basted the edges by hand. In order to increase the ease of getting the garment on and off, I added an invisible zipper to the left side seam. I sewed this normally with the two layers (lace and lining) together as one, then finished the edges with bias tape and pressed the seam allowances apart. There is still some bulk there, but the zipper does add some ease, so I’m content with the result.
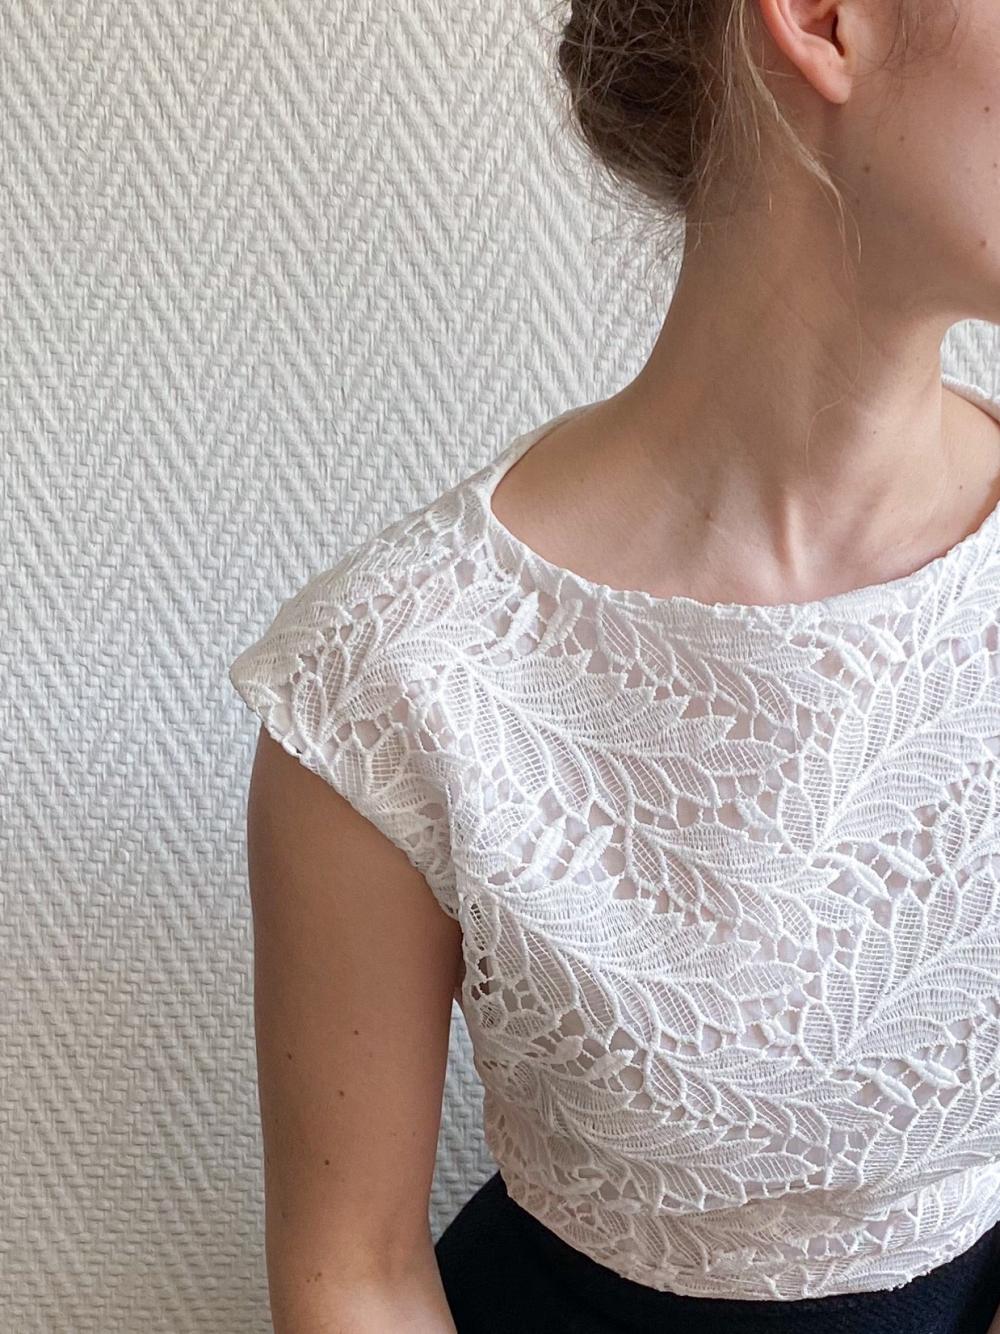
To finish the garment, I finished the neckline, armholes, and hem with the bias tape I’d made, understitched it, and then folded the bias tap under. To keep it from flapping, I then hand stitched the inner edge of the bias tape to the lining with a herringbone stitch.
I can say without a doubt that this project was one of the most complicated and labor-intensive projects I’ve ever taken on, but I am very pleased with the final result! I realized quite early when I saw the quality of the fabric, then when I invested so much time adding hand-sewn and couture finishes, that this top would not be like my beloved RTW stretch lace top at all. My stretch lace top was more like a fancy t-shirt, while this top is a delicate and care-intensive creation. I love it for special occasions, especially professional ones, but it’s not a casual, everyday garment!
All in all, I am very happy with this creation and I discovered that I very much like hand sewing – I find it very calming! I’m proud of this creation and I hope that these project details will inspire others to give it a go too.
Thanks for reading!
Sarah
IG: sarah__naomi_
I remember back in 2012-ish when white lace tops were very much in fashion. I had a ready-to-wear stretch lace top that I wore and absolutely loved until the fabric was slack and a grimy, grey color. So ever since I started sewing, I’ve wanted to make another that I could love as dearly as my old top.
Choosing the right fabric was difficult, though, because a lot of stretch lace either features a pattern that is too busy, too shiny, or meant for lingerie. I had also seen creations popping up with non-stretch guipure lace and the idea of trying my hand with one of these lovely fabrics was very tempting. So when Minerva proposed this embroidered lace fabric in this pretty leaf design, I was hooked!
Choosing the right pattern for this top was very challenging, because I knew I wouldn’t be able to sew seams together normally without creating bulk. At the same time, the boxy silhouette is not for me, so I decided to spend extra time researching how to create shape with non-stretch lace fabrics.
One article that really helped me was the Cashmerette blog post on how to make their Montrose top in guipure lace. It goes into detail on how to cut around the shapes and then layer and sew them down to create seams and darts without adding too much bulk and I highly recommend taking a look. Unfortunately, the Montrose top isn’t offered in my size, so I had to look elsewhere.
In the end, I choose the Danmark top pattern by How to do Fashion (no. 00), a free pattern you get if you sign up to their newsletter. I had made this top once before in a viscose fabric and I liked the feminine shape to it. This fabric also doesn’t come in my size (available in sizes 34-48), but I had previously graded it down manually one size to fit me, including grading the bust and waist darts.
I also choose to line this garment because I wanted the top to be pretty opaque throughout. I choose a cotton lawn in a slightly off-white color that complemented the lace fabric well from the fabric shop Tissus Reine in Paris. I cut out the lining fabric normally, but then retraced the pattern so that I could cut the lace layer out flat (mirroring the front and back to eliminate cutting on the fold) and removed the seam allowance from one of the side seams as well as the neckline and armhole hems (leaving the seam allowances on one of the side seams in order to able to insert a zipper later). Rather than use a facing to finish these edges, I made bias tape from the leftover cotton lawn I had left from cutting out the lining, and I finished those edges with the bias tape.
On the lining pieces, I sewed the darts normally, and then sewed the shoulder seams and one side seam with French seams. On the lace fabric, I cut, superposed, and then hand-sewed the six darts and the two shoulder seams. To do so, I thread traced the darts legs and the seam lines where the lace would need to overlap, cut and placed the lace so that the lines corresponded, then carefully hand-sewed the lace layers together with tiny fell stitches, contouring the leaf designs and filling in any gaping holes with scraps. This was a painstakingly long step that I spent hours doing, but it was actually a pretty satisfying step in the end.
I then placed the lace shell and the lining together and basted the edges by hand. In order to increase the ease of getting the garment on and off, I added an invisible zipper to the left side seam. I sewed this normally with the two layers (lace and lining) together as one, then finished the edges with bias tape and pressed the seam allowances apart. There is still some bulk there, but the zipper does add some ease, so I’m content with the result.
To finish the garment, I finished the neckline, armholes, and hem with the bias tape I’d made, understitched it, and then folded the bias tap under. To keep it from flapping, I then hand stitched the inner edge of the bias tape to the lining with a herringbone stitch.
I can say without a doubt that this project was one of the most complicated and labor-intensive projects I’ve ever taken on, but I am very pleased with the final result! I realized quite early when I saw the quality of the fabric, then when I invested so much time adding hand-sewn and couture finishes, that this top would not be like my beloved RTW stretch lace top at all. My stretch lace top was more like a fancy t-shirt, while this top is a delicate and care-intensive creation. I love it for special occasions, especially professional ones, but it’s not a casual, everyday garment!
All in all, I am very happy with this creation and I discovered that I very much like hand sewing – I find it very calming! I’m proud of this creation and I hope that these project details will inspire others to give it a go too.
Thanks for reading!
Sarah
IG: sarah__naomi_