


7 years ago
Muslin/toile:
Size - 2 at the shoulders/sleeves, grade to a 3 at the waist.
Initially I thought I would sew a muslin for this project. I realized this book encourages you to mix and match elements and “break the pattern.” For the muslin, I thought I would reference the tunic option for the Sade pattern. The tunic has a solid back pattern piece included. I had in mind for the muslin a challenging wool/gauze fabric. I ended up running out of time with the muslin process and decided to abandon it.
The book has paper copies of the patterns included. Admittedly, the process of tracing patterns from a book can take time. Upon studying the patterns a bit, I learned that this book has each pattern printed on one page of paper (overlayed). The pattern pieces aren’t intermixed across multiple pieces of paper but instead one pattern is on one piece of paper. As I’ve noticed each pattern book has it’s own way of formatting the included paper patterns, it’s helpful to study the pattern sheets a bit before tracing out a pattern.
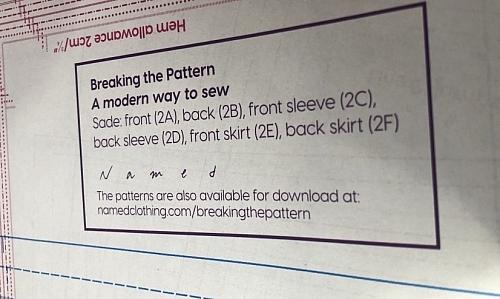
The Sade blouse has a label on the pattern sheet, for reference. After I finished this project, I found on the Named website a location where you can download the pattern PDFs from the book (if you’d rather tape a PDF together instead of tracing out the overlayed pattern pieces). Although I appreciate that the book comes with the paper pattern, in the future I’ll be taking advantage of the digital PDF option. I believe this will save me time with the tracing for future patterns from this book.
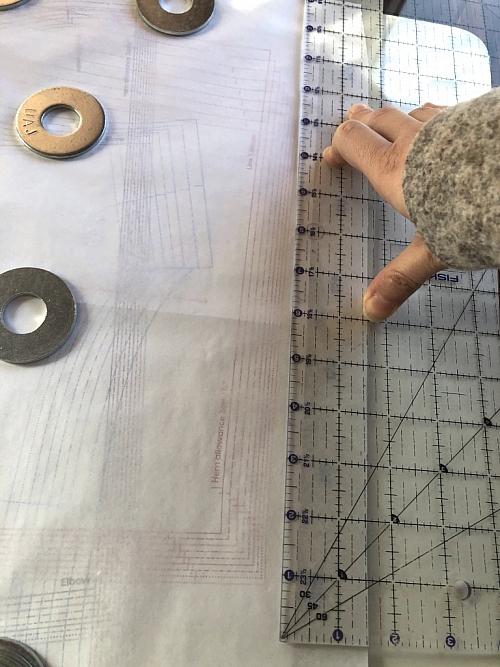
I didn’t find a size chart to reference the size/tracing lines (which line is associated with which size). To determine which lines to trace, I held up a ruler to the lower line. I found that the lower line is shorter than the top line (so the lower line is the size 1).
Sleeves:
I thought I’d share how I modified the sleeves. I laughed a bit as I went through this process as I felt I was “unhacking” a hacked pattern. More commonly, people will “pattern hack” a pattern to modify and add a unique detail (to change the original pattern). The Sade blouse (the original pattern) has sleeves with open slits and an open paneled back, included in the pattern.
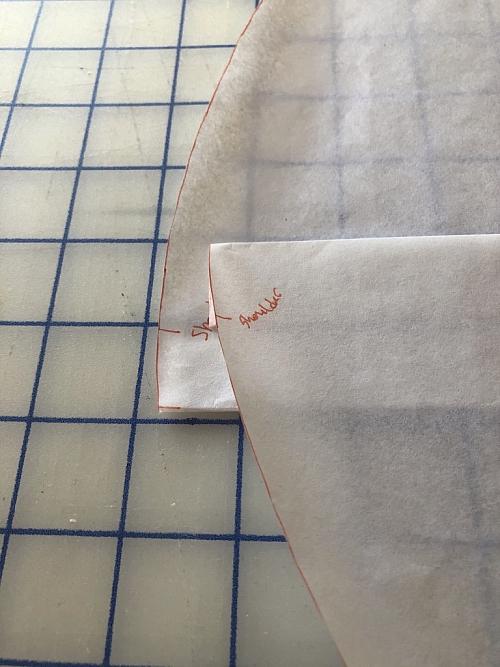
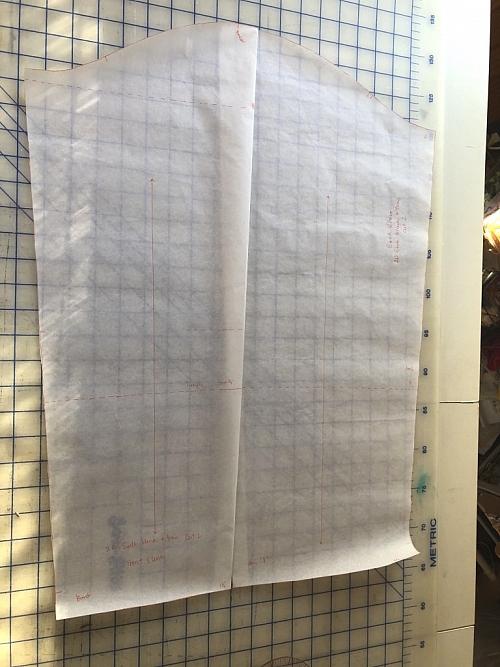
To modify the sleeves, I first traced out the left and right sleeve panels. I folded under the seam allowances along the inside edges of each of the two sleeve panels. At the top shoulder notch line, I overlayed each of the sleeve panels together.
I then laid the bottom of the sleeve edges together.
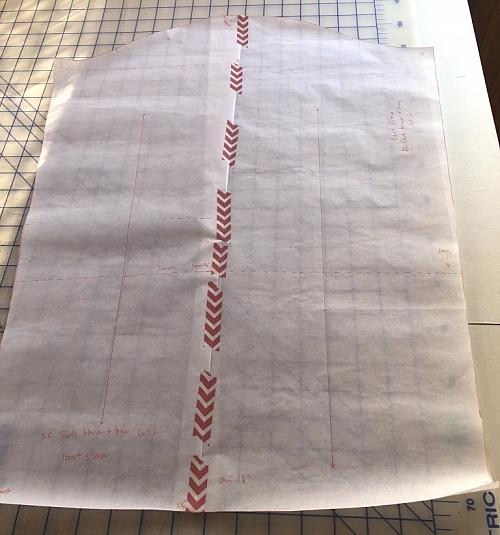
Using washi tape, I taped each of the sleeve panels together to create a single sleeve pattern piece (removing the slit details).
Bodice:
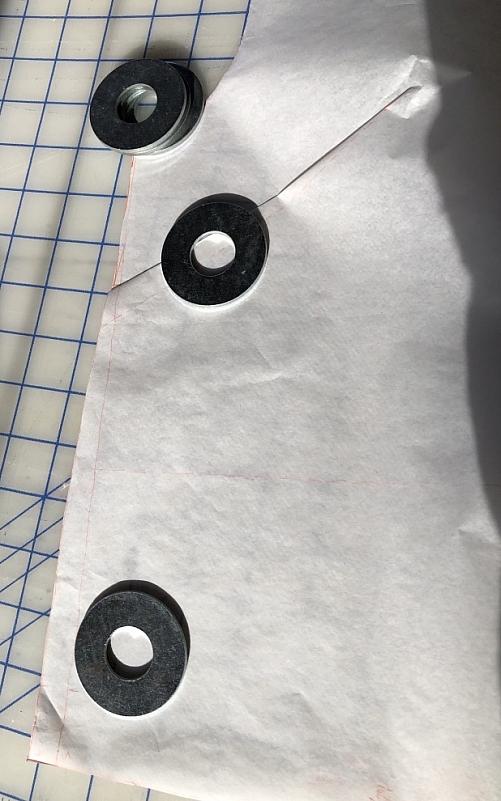
For the front and back bodice pieces, I graded out from a 2 at the top of a bodice to a three at the waist. This size grading occurred through the bust dart so I added tracing paper to smooth out the transition through the bust dart. I tested this transition by folding the bust dart on the traced pattern pieces:
Continued in my next post…
#minervamakes #minervamakers #isew #memade #memades #sewing #sewist #sewists #sewinginspo #sewinginspiration #sew #sewcialist #sewingproject #sewingprojects #sewingideas #sewingprojectideas #sewingpatterninspo #lovesewing #ilovesewing #sewsewsew #sewersgonnasew #makersgonnamake #sewaholic #sewaholics #shareyoursewing #sewinglove #handmadewardrobe #handemadeclothes #isewmyclothes #diyclothes #dressmaking #fabricinspo #seamstress #memadeeveryday #imakemyclothes #imakemyownclothes #fashion #fashioninspo #memadewardrobe #memadefashion #diyfashion #diywardrobe #fashionsewing #indiepatterns #indiesewingpatterns #breakingthepattern #breakingthepatternbook #breakingthepatternsade #breakingthepatternsadeblouse #sade #sadeblouse #namedpatterns #namedclothingpaterns #namedsadeblouse #sewingtops #sewingblouses #mustard #sewingwithgauze #sewingwithdoublegauze #gauzesewingprojects #doublegauzesewingprojects
Size - 2 at the shoulders/sleeves, grade to a 3 at the waist.
Initially I thought I would sew a muslin for this project. I realized this book encourages you to mix and match elements and “break the pattern.” For the muslin, I thought I would reference the tunic option for the Sade pattern. The tunic has a solid back pattern piece included. I had in mind for the muslin a challenging wool/gauze fabric. I ended up running out of time with the muslin process and decided to abandon it.
The book has paper copies of the patterns included. Admittedly, the process of tracing patterns from a book can take time. Upon studying the patterns a bit, I learned that this book has each pattern printed on one page of paper (overlayed). The pattern pieces aren’t intermixed across multiple pieces of paper but instead one pattern is on one piece of paper. As I’ve noticed each pattern book has it’s own way of formatting the included paper patterns, it’s helpful to study the pattern sheets a bit before tracing out a pattern.
The Sade blouse has a label on the pattern sheet, for reference. After I finished this project, I found on the Named website a location where you can download the pattern PDFs from the book (if you’d rather tape a PDF together instead of tracing out the overlayed pattern pieces). Although I appreciate that the book comes with the paper pattern, in the future I’ll be taking advantage of the digital PDF option. I believe this will save me time with the tracing for future patterns from this book.
I didn’t find a size chart to reference the size/tracing lines (which line is associated with which size). To determine which lines to trace, I held up a ruler to the lower line. I found that the lower line is shorter than the top line (so the lower line is the size 1).
Sleeves:
I thought I’d share how I modified the sleeves. I laughed a bit as I went through this process as I felt I was “unhacking” a hacked pattern. More commonly, people will “pattern hack” a pattern to modify and add a unique detail (to change the original pattern). The Sade blouse (the original pattern) has sleeves with open slits and an open paneled back, included in the pattern.
To modify the sleeves, I first traced out the left and right sleeve panels. I folded under the seam allowances along the inside edges of each of the two sleeve panels. At the top shoulder notch line, I overlayed each of the sleeve panels together.
I then laid the bottom of the sleeve edges together.
Using washi tape, I taped each of the sleeve panels together to create a single sleeve pattern piece (removing the slit details).
Bodice:
For the front and back bodice pieces, I graded out from a 2 at the top of a bodice to a three at the waist. This size grading occurred through the bust dart so I added tracing paper to smooth out the transition through the bust dart. I tested this transition by folding the bust dart on the traced pattern pieces:
Continued in my next post…
#minervamakes #minervamakers #isew #memade #memades #sewing #sewist #sewists #sewinginspo #sewinginspiration #sew #sewcialist #sewingproject #sewingprojects #sewingideas #sewingprojectideas #sewingpatterninspo #lovesewing #ilovesewing #sewsewsew #sewersgonnasew #makersgonnamake #sewaholic #sewaholics #shareyoursewing #sewinglove #handmadewardrobe #handemadeclothes #isewmyclothes #diyclothes #dressmaking #fabricinspo #seamstress #memadeeveryday #imakemyclothes #imakemyownclothes #fashion #fashioninspo #memadewardrobe #memadefashion #diyfashion #diywardrobe #fashionsewing #indiepatterns #indiesewingpatterns #breakingthepattern #breakingthepatternbook #breakingthepatternsade #breakingthepatternsadeblouse #sade #sadeblouse #namedpatterns #namedclothingpaterns #namedsadeblouse #sewingtops #sewingblouses #mustard #sewingwithgauze #sewingwithdoublegauze #gauzesewingprojects #doublegauzesewingprojects
Add all tagged items to your basket