



7 years ago

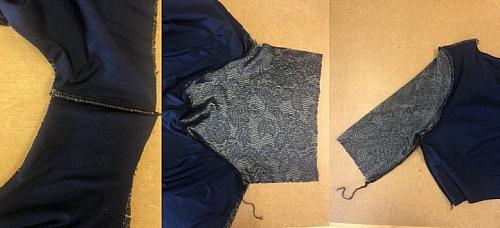
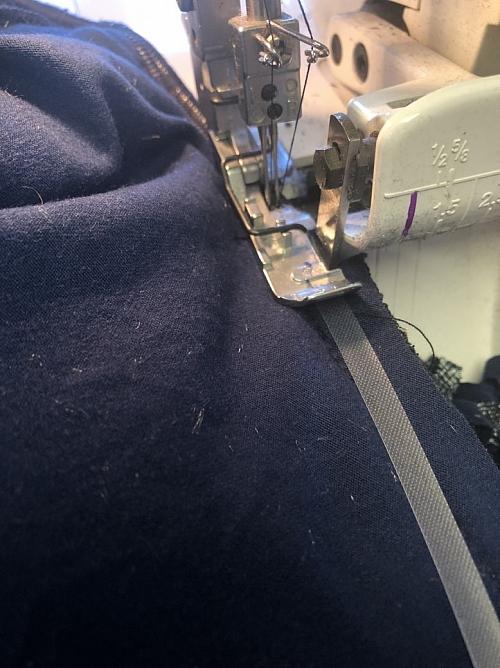
As with all stretch garments the shoulders should always be stabilised with either a cotton tape or clear elastic when being sewn. This is because these seams hold the weight of the entire garment under them so you don’t want them stretching out of place. I will often use a strip of the selvedge of the fabric to do this job but with something as heavy as this, the clear elastic was going to be necessary to help stabilise them.
Once the shoulders are sewn together, the sleeves are inserted before the side and underarm seams are sewn up in one line. As you can see, I have sewn these seams on the overlocker, but if you don’t have one available using a straight stitch and then neatening with a zig-zag will work just as well.
With the bodice all together, I then made the 2 skirts separately before basting them together at the waist edge before attaching to the bodice. The reason I made 2 skirts rather than layering the fabrics and then sewing the side seams was as I like the underskirt to be slightly shorter than the overlay and this is far easier to do if they are completely separate hems. (I also think the skirt always moves more freely when made this way too)
As the skirts are attached to the bodice (making sure the longer piece for the maternity hack is definitely at the front) the clear elastic is used again to stabilise this seam as it takes the whole weight of the skirt. I stretched the elastic ever so slightly as I sewed as I wanted the waist to pull in nicely and this would ensure that it wasn’t baggy here at all.
At this stage I then tried it on and considered whether the lengthened piece needed to be shortened slightly based on how small/large the bump was at that stage. I then adjusted the length so it was how I wanted it before turning a hem on the skirts and the sleeves.
This dress looks complex (because of the twist) but is actually really simple to sew together and yet looks absolutely stunning.
I do however have to make one tiny confession… I made a rather catastrophic error whilst making this (which I am totally going to blame on baby brain) as I managed to cut all the pieces with the stretch on the lace going vertically instead of horizontally. I fortunately noticed this before attaching the bodice to the skirts and even more fortunately had enough fabric to re-cut the whole bodice out and re-make it with the stretch going in the right direction. I should have checked the direction the stretch was going in and I have no idea why on this occasion I didn’t… but it’s a lesson well learnt and has just goes to prove that you really should check twice and cut once.
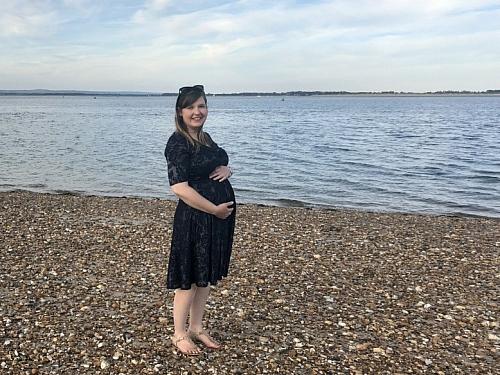
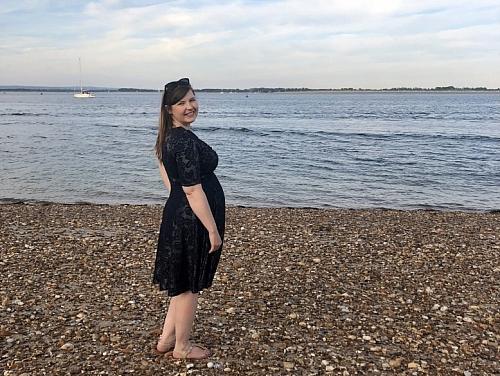
I am truly thrilled with this dress, and think it’s going to look fabulous when I’m not pregnant too, as the way it hangs is just really flattering. The slightly empire-line seam means it will skim over all my wobbly bits… fabulous for a post-baby body of the future.
#tillyandthebuttons #tillyandthebuttonspatterns #tillyandthebuttonsjoni #tillyandthebuttonsjonidress #joni #jonidress #maternityjoni #maternitysewing #sewingformaternity #indiepatterns #indiesewingpatterns #sewingwithlace #lacesewingprojects #minervamakes #minervamakers #isew #memade #memades #sewing #sewist #sewists #sewinginspo #sewinginspiration #sew #sewcialist #sewingproject #sewingprojects #sewingideas #sewingprojectideas #sewingpatterninspo #lovesewing #ilovesewing #sewsewsew #sewersgonnasew #makersgonnamake #sewaholic #sewaholics #shareyoursewing #sewinglove #handmadewardrobe #handemadeclothes #isewmyclothes #memadefashion #diyclothes #diyfashion #diywardrobe #dressmaking #fabricinspo #fashionsewing #seamstress #memadeeveryday #imakemyclothes #imakemyownclothes #fashion #fashioninspo #memadewardrobe
Once the shoulders are sewn together, the sleeves are inserted before the side and underarm seams are sewn up in one line. As you can see, I have sewn these seams on the overlocker, but if you don’t have one available using a straight stitch and then neatening with a zig-zag will work just as well.
With the bodice all together, I then made the 2 skirts separately before basting them together at the waist edge before attaching to the bodice. The reason I made 2 skirts rather than layering the fabrics and then sewing the side seams was as I like the underskirt to be slightly shorter than the overlay and this is far easier to do if they are completely separate hems. (I also think the skirt always moves more freely when made this way too)
As the skirts are attached to the bodice (making sure the longer piece for the maternity hack is definitely at the front) the clear elastic is used again to stabilise this seam as it takes the whole weight of the skirt. I stretched the elastic ever so slightly as I sewed as I wanted the waist to pull in nicely and this would ensure that it wasn’t baggy here at all.
At this stage I then tried it on and considered whether the lengthened piece needed to be shortened slightly based on how small/large the bump was at that stage. I then adjusted the length so it was how I wanted it before turning a hem on the skirts and the sleeves.
This dress looks complex (because of the twist) but is actually really simple to sew together and yet looks absolutely stunning.
I do however have to make one tiny confession… I made a rather catastrophic error whilst making this (which I am totally going to blame on baby brain) as I managed to cut all the pieces with the stretch on the lace going vertically instead of horizontally. I fortunately noticed this before attaching the bodice to the skirts and even more fortunately had enough fabric to re-cut the whole bodice out and re-make it with the stretch going in the right direction. I should have checked the direction the stretch was going in and I have no idea why on this occasion I didn’t… but it’s a lesson well learnt and has just goes to prove that you really should check twice and cut once.
I am truly thrilled with this dress, and think it’s going to look fabulous when I’m not pregnant too, as the way it hangs is just really flattering. The slightly empire-line seam means it will skim over all my wobbly bits… fabulous for a post-baby body of the future.
#tillyandthebuttons #tillyandthebuttonspatterns #tillyandthebuttonsjoni #tillyandthebuttonsjonidress #joni #jonidress #maternityjoni #maternitysewing #sewingformaternity #indiepatterns #indiesewingpatterns #sewingwithlace #lacesewingprojects #minervamakes #minervamakers #isew #memade #memades #sewing #sewist #sewists #sewinginspo #sewinginspiration #sew #sewcialist #sewingproject #sewingprojects #sewingideas #sewingprojectideas #sewingpatterninspo #lovesewing #ilovesewing #sewsewsew #sewersgonnasew #makersgonnamake #sewaholic #sewaholics #shareyoursewing #sewinglove #handmadewardrobe #handemadeclothes #isewmyclothes #memadefashion #diyclothes #diyfashion #diywardrobe #dressmaking #fabricinspo #fashionsewing #seamstress #memadeeveryday #imakemyclothes #imakemyownclothes #fashion #fashioninspo #memadewardrobe
Add all tagged items to your basket