



8 years ago
Anyone who sews needs pincushions! I honestly don't think you can have too many, I have one in every room!
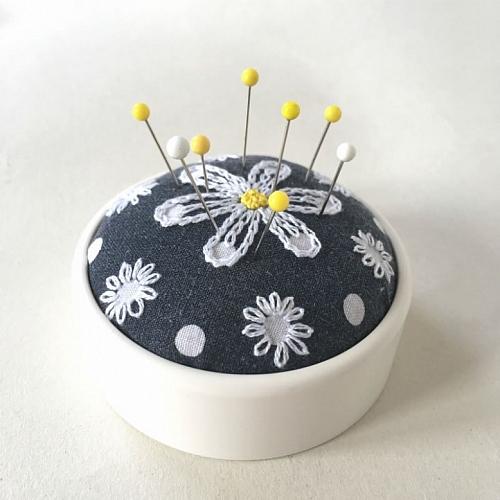
So I was excited to try out this cute Create a Pincushion Kit from Clover .
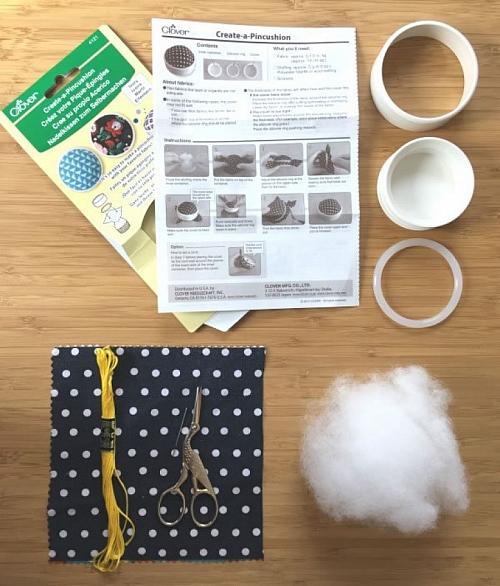
In the kit you get 2 parts of the pincushion, a grippy rubbery ring, and full instructions.
You need to add your own: fabric, fibre fill stuffing, embroidery thread (I used yellow and white).
You also need: needle, scissors, embroidery hoop.
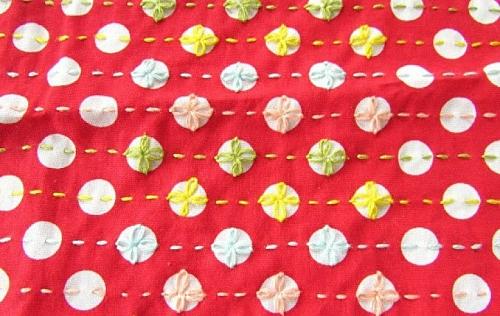
I tried out some embroidery on a polka dot fabric to make a bag a little while ago.
I really loved the effect that you can get, playing with the regular dotty pattern so thought this pincushion kit was a good chance to try a little more.
Cut a square of polka dot fabric, the instruction let you know how big that needs to be, and find the most central dot.
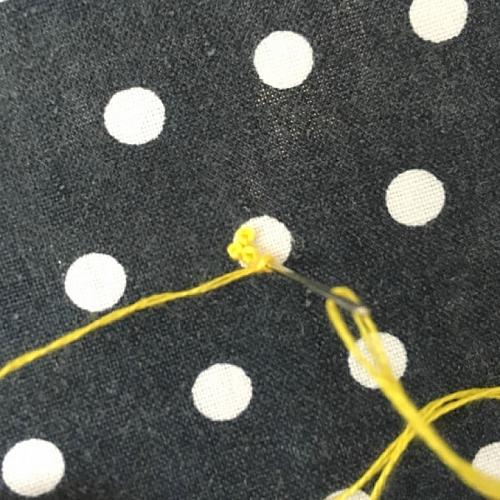
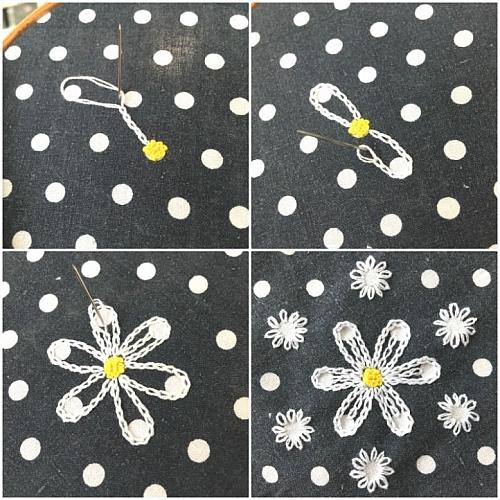
Pop the fabric in an embroidery hoop and fill that dot with yellow french knots, using 2 strands of embroidery thread.
Next work chain stitch petals in white, working from the central yellow dot, out to the next dot, round it and back to the centre. Repeat for each of the 6 petals and then chain stitch a line up the centre of each petal.
Add some smaller flowers on the dots between the petals. Work a simple lazy daisy stitch all around the dot to form a flower.
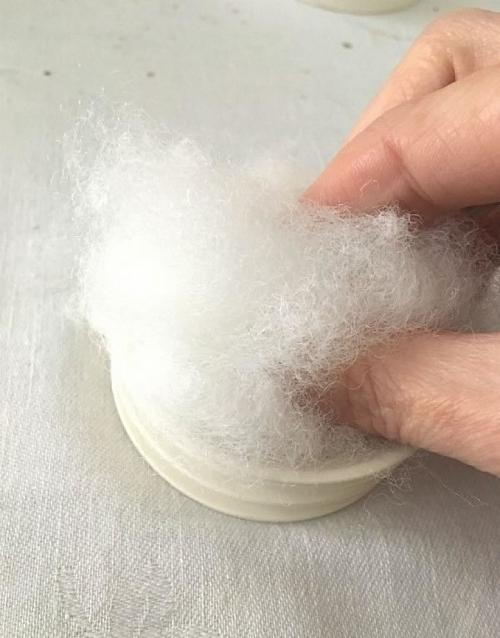
Take a handful of fibre fill stuffing and squish it into the base of the pincushion.
To be continued…..
#minervamakes #minervamakers #isew #memade #memades #sewing #sewist #sewists #sewinginspo #sewinginspiration #sew #sewcialist #sewingproject #sewingprojects #sewingideas #sewingprojectideas #sewingpatterninspo #lovesewing #ilovesewing #sewsewsew #sewersgonnasew #makersgonnamake #sewaholic #sewaholics #shareyoursewing #sewinglove #sewingpincushions #pincushion #clovercreateapincushionkit #cloverproductreview
So I was excited to try out this cute Create a Pincushion Kit from Clover .
In the kit you get 2 parts of the pincushion, a grippy rubbery ring, and full instructions.
You need to add your own: fabric, fibre fill stuffing, embroidery thread (I used yellow and white).
You also need: needle, scissors, embroidery hoop.
I tried out some embroidery on a polka dot fabric to make a bag a little while ago.
I really loved the effect that you can get, playing with the regular dotty pattern so thought this pincushion kit was a good chance to try a little more.
Cut a square of polka dot fabric, the instruction let you know how big that needs to be, and find the most central dot.
Pop the fabric in an embroidery hoop and fill that dot with yellow french knots, using 2 strands of embroidery thread.
Next work chain stitch petals in white, working from the central yellow dot, out to the next dot, round it and back to the centre. Repeat for each of the 6 petals and then chain stitch a line up the centre of each petal.
Add some smaller flowers on the dots between the petals. Work a simple lazy daisy stitch all around the dot to form a flower.
Take a handful of fibre fill stuffing and squish it into the base of the pincushion.
To be continued…..
#minervamakes #minervamakers #isew #memade #memades #sewing #sewist #sewists #sewinginspo #sewinginspiration #sew #sewcialist #sewingproject #sewingprojects #sewingideas #sewingprojectideas #sewingpatterninspo #lovesewing #ilovesewing #sewsewsew #sewersgonnasew #makersgonnamake #sewaholic #sewaholics #shareyoursewing #sewinglove #sewingpincushions #pincushion #clovercreateapincushionkit #cloverproductreview